Two weeks ago I listed a wooden rolling pin at WildWoodWorks, and the item made it onto the front page of Etsy not once, but TWICE in two days! I was beyond thrilled. The rolling pin has since sold and is now in the hands of its new owner.
Well, this weekend I made another rolling pin and, as I had found some locally-made beeswax, decided to turn a honey dipper and finish it with beeswax. I listed the items yesterday and was please to find that the honey dipper had sold this morning.
Then, to my surprise, as I was perusing my shop statistics on craftcult.com's heartomatic, I found that the honey dipper had been on the front page of Etsy just this morning!
Here are all three archived treasury listings from craftcult.com.
And now I need to go turn some more honey dippers! ButterflyHeavens and I are going to start featuring each others' items in our listings; she sells raw, local honey from her brother's bees in Michigan, and I plan on buying myself some once my current stash of honey is gone.
Now I need to write a blog post about what I broke last weekend ;)
Friday, April 3, 2009
Friday, March 13, 2009
Baby Rattle from Start to Finish

Sorry for the washed-out quality of some of the photos; it was dark in the shop! This is some scavenged wood that we think is Southern Red Oak.

Rounded and starting on the captive rings.


One captive ring done and one halfway there! I tried some new tools - a $1.50 package of tools that look like those scrapers dentists use to get the plaque off your teeth. I had heard somewhere that dentist's scrapers were decent tools for parting the last little bit of a captive ring. Well, I'm not a big fan. My tools were very soft and they are rather misshapen now after the beating I gave them on the lathe. Apparently cheap tools really don't work all that well ;)


Now I have three captive rings and am shaping the top and bottom of the rattle. I caught my skew in the top when it was nearly finished, so I had to take off quite a bit of wood to get it right again. Bah. I still like the way it turned out.


And done! I finished it by sanding to 220, burnishing it with shavings, and then coconut oil while it was still on the lathe. It is very pretty, very smooth, and perfectly safe for my friend's baby to stick in her mouth.
Sunday, March 8, 2009
From start to finish: Bump hairstick

This is how the wood started: As, well, wood! My husband and I asked our neighbor if he wanted the giant log in his front yard gone, he said yes, and we took it. I believe this type of wood is Southern Live Oak, though it's hard to tell without any leaves to go by. At any rate, it's white, hard, and still somewhat wet, which makes it easier to turn.

This piece I have here was chopped by the chainsaw and then ripped by the table saw. I didn't do this part; my husband did. He likes making blanks, and I like turning them!

Appropriate safety gear is a must! Safety glasses to keep my eyes safe, a dust mask to keep my lungs healthy, and a do-rag to keep the dust out of my hair.

Then the blank is mounted on the lathe. I am going to make it round with this roughing gouge.

Ok, it's been rounded!

Now I take my measuring tape (which is ever so conveniently stuck to my cast iron lathe by the magic of magnetism) and mark off one-inch segments. These will be the bumps.

With my skew chisel I go and take out the material I don't need between the bumps, then make sure the bumps are fairly good-looking. I'm not going for perfection; just something consistent.

The unexpected figure in this wood really highlights the bumps!

The bumps are done; now to sand. I started with 150 grit, then moved to 220 and finally 400 before I parted the tip.

If I had a chuck I would stick the tip back in and part off the other end, but as I don't, the hacksaw works just fine - and then I smooth off any imperfections on the grinder you see next to my wrist.

And done! I made two today - the one under my thumb is the live oak one and the other, I believe, is cedar. Then I went to put sealer on them - I used a nontoxic waterproofing sealer.

But alas, I poked a hole in my hand when trying to put the lid back on and decided that was enough picture taking for now!
Saturday, October 11, 2008
Today's productions: 10.11.08
Chinese Chopstick Hairsticks:


Naked hairstick:

Striped Autumn Manzanita Hairstick:

Extra-Long Manzanita Hairstick:

I also carved a hair fork and painted it black. Now I think I'm going to go back out in the shop and practice my fork carving technique. I think it needs work. :)


Naked hairstick:

Striped Autumn Manzanita Hairstick:

Extra-Long Manzanita Hairstick:

I also carved a hair fork and painted it black. Now I think I'm going to go back out in the shop and practice my fork carving technique. I think it needs work. :)
How to use hairsticks
All right. Suppose you have long hair. Really long hair. Long enough to sit on it hair. How are you supposed to to use a stick to hold all your hair up!?
Tell you what, how about I show you? And by the way, if your hair is longer than about shoulder length, you can use hairsticks to hold it up too.
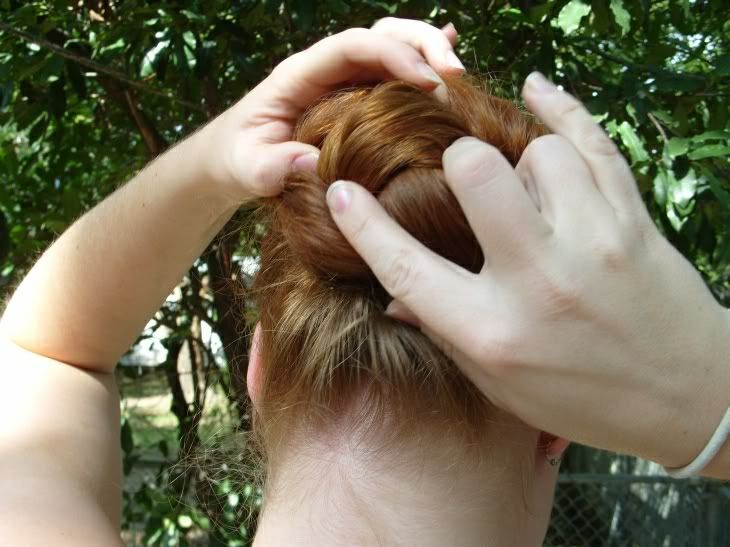
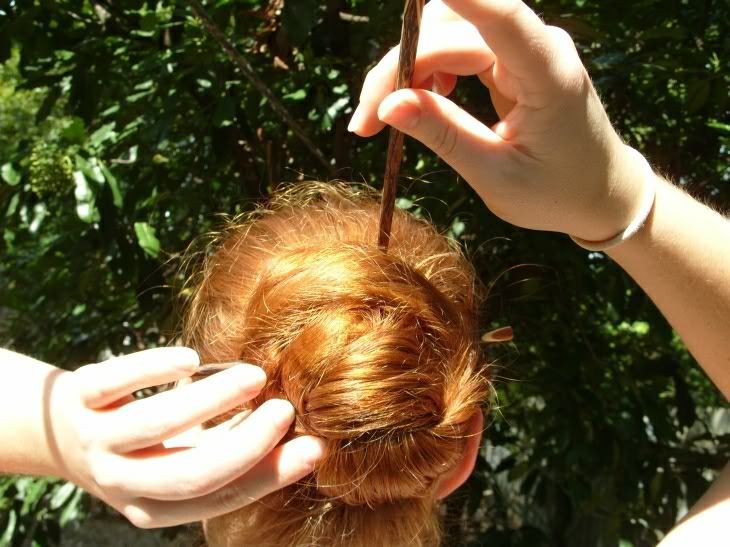
Ok, first, wind your hair into a bun.

Insert the stick from the side, pointed at your scalp so you grab some scalp hair.
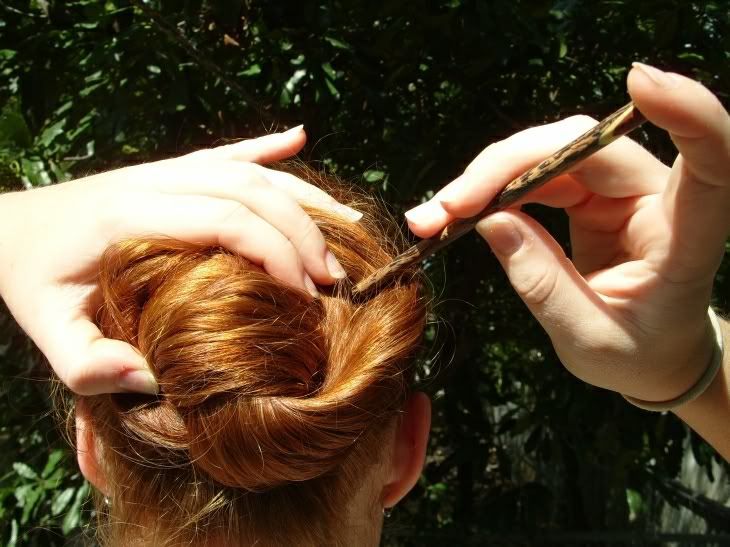
Once you feel the stick scrape up some scalp hair, pull the stick towards your face so that it's more level with your bun.
Tell you what, how about I show you? And by the way, if your hair is longer than about shoulder length, you can use hairsticks to hold it up too.
Ok, first, wind your hair into a bun.
Insert the stick from the side, pointed at your scalp so you grab some scalp hair.
Once you feel the stick scrape up some scalp hair, pull the stick towards your face so that it's more level with your bun.
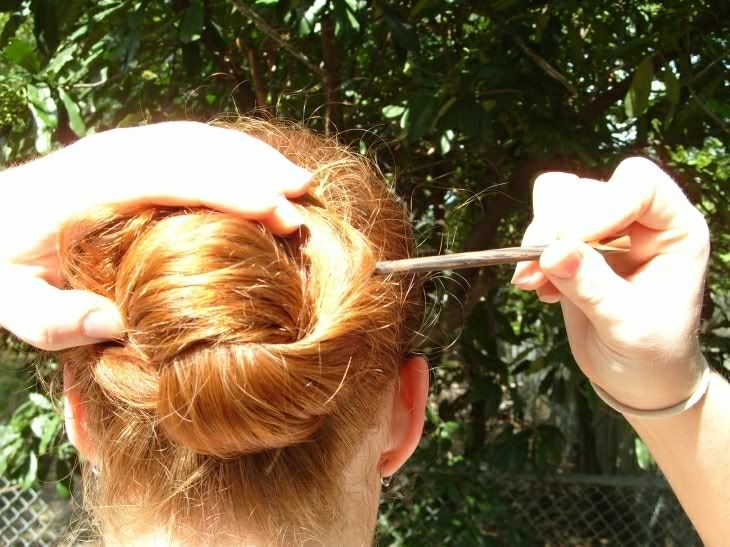
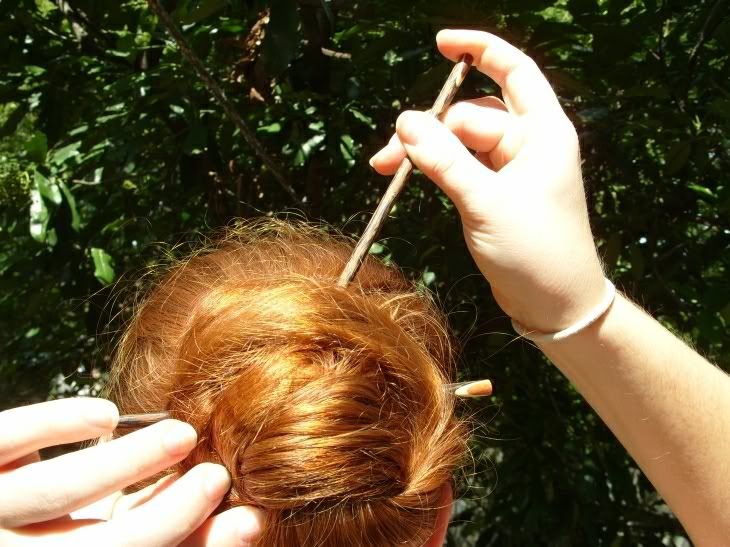
Now push it back out the other side of your bun.
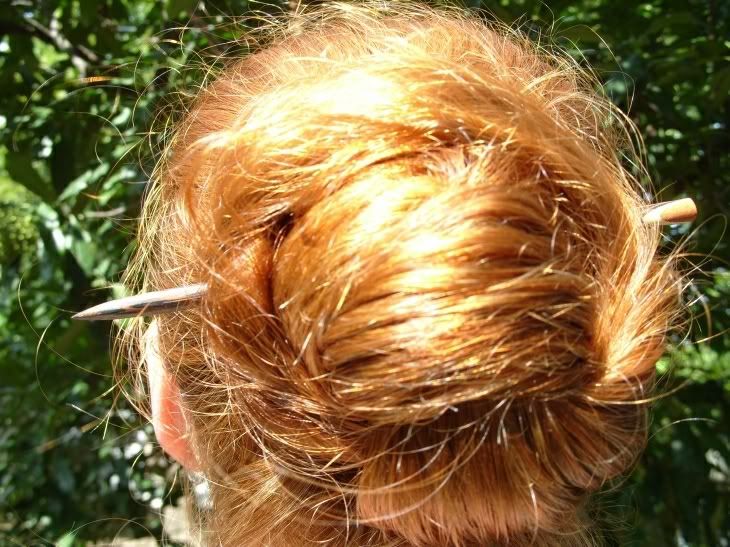
There you go! All my hair (and I have a lot of hair) is being held up with one six-inch-long chopstick. Sometimes I like to put matching sticks in my hair.
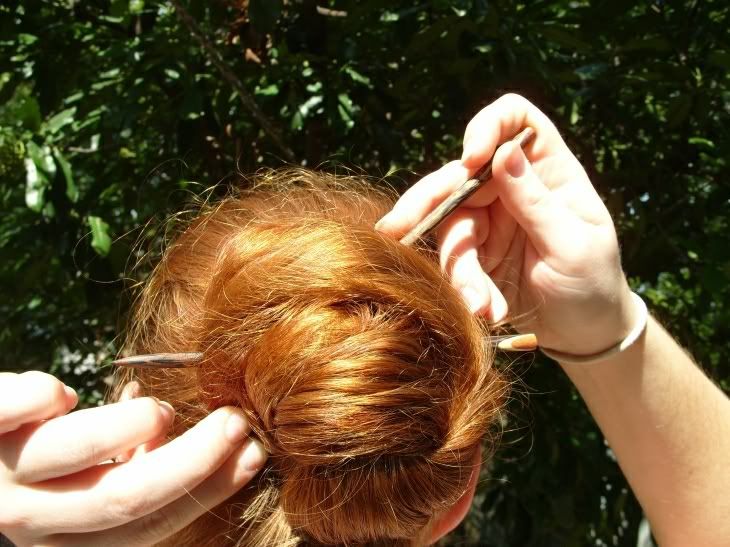
Follow the same process to put the second stick in. Grab some scalp hair:
Pull the stick towards your face:
Then push it down and through:
Done! This will hold all day.
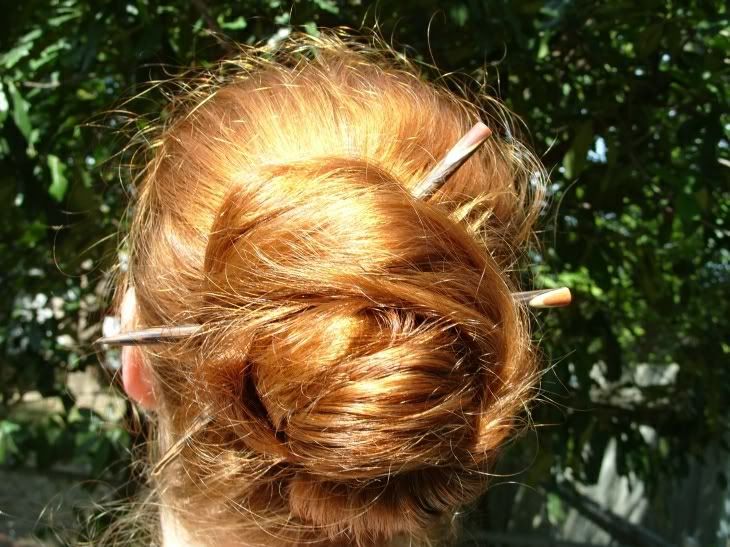
Instructions for this particular bun can be found at The Long Hair Community.
Monday, October 6, 2008
Subscribe to:
Posts (Atom)